
Move your Shopify store to WordPress and WooCommerce
If monthly subscriptions and platform fees are cutting into your sales, moving from Shopify to WordPress is a practical Shopify alternative. ShipPress copies your live Shopify products into WooCommerce on your computer, so you can review everything before spending on hosting. You own the store, control the software, and decide when to go live.
-
Why move from Shopify to WordPress?
Many small sellers start on hosted platforms or marketplaces like Etsy, but monthly plans, paid add-ons, and transaction fees add up over time. Platform rules can change without warning, leaving you with little control over your business.
Moving your shop to WordPress with WooCommerce gives you ownership over your store. WooCommerce is a free plugin, and there is no monthly platform subscription for the shop software. Running your own store still has costs: you pay for your domain name, a WordPress host of your choice, and payment-provider fees per sale.
ShipPress is free to download for Mac, Windows & Linux (install guide). It builds a real WordPress store on your own computer first. You can adjust products and pages privately by chatting with the AI helper; nothing is visible online until you choose to go live.
-
Back up your products in Shopify
Keep your Shopify store online and publicly accessible throughout the entire moving process. ShipPress reads product information and downloads pictures directly from the live store.
Before you begin, export a copy of your catalog as a safety backup. In your Shopify admin, go to Products, select Export, choose All products, and click Export products. Shopify will generate a CSV file. Note that product images stay hosted on Shopify and collections are not included in this file, so keep your live store active. For details on the export format, see the Shopify Help Center: Exporting products.
-
Start the import in ShipPress
Open ShipPress. On the Home screen, click the Import from a website tab under the heading Import a website from its address. The app asks Which website do you want to copy? The original store is never altered, and importing uses no credits.
Type your store's public web address—either your custom domain or your myshopify.com address (you can omit https://). Click Next, give the new site a name if you like, and click Scan pages. ShipPress scans the sitemap, checks robots.txt, and detects that your site is a shop. Learn more about website scanning in our import guide.
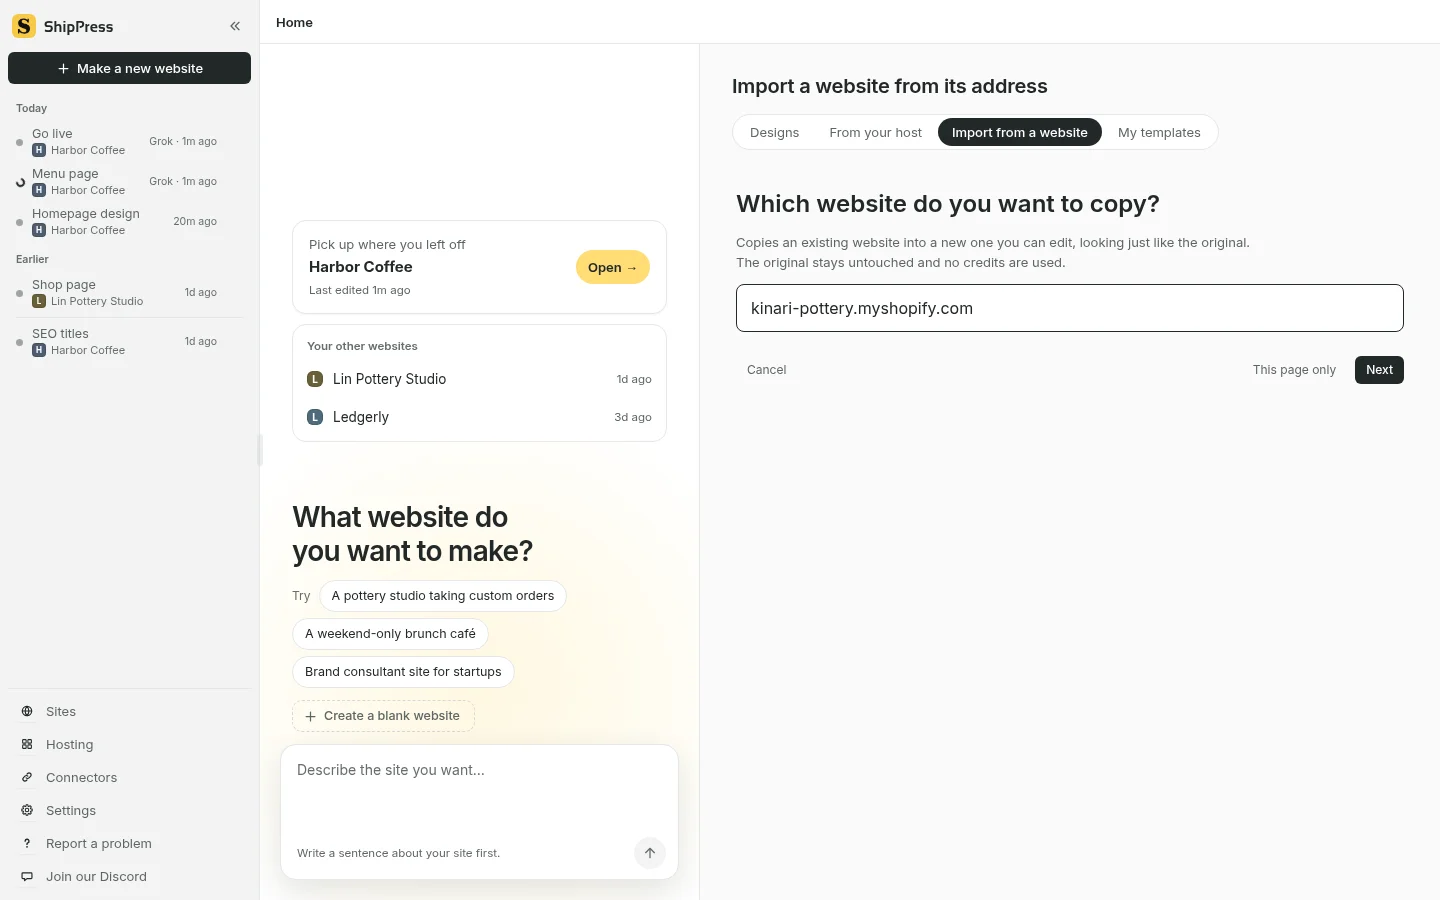
Enter your store address in the Import from a website tab to begin scanning pages. -
Bring over products into WooCommerce
When ShipPress detects your store catalog, it asks Bring over the products? with the prompt Found … products. Bring them over as WooCommerce products?
Choose Yes, as WooCommerce products (labeled Installs WooCommerce; keeps prices, pictures, categories and variations). If you do not want to migrate products right now, you can select No, leave the products out.
Next, select the pages you want to copy, such as your About or Contact page, using Pick all or Untick all (the front page is always copied). On the final step, Check it over, review the summary and click Start import. ShipPress copies the pages in batches (about 30 seconds per page) and installs the official WooCommerce plugin, then makes the products. Please keep the app open during this process.
ShipPress can import up to 1,000 products with up to 100 variations each. It brings over product names, descriptions, prices, categories, tags, SKU, stock status, options, variations, and images. A product with a Shopify "compare at" price comes over on sale: the compare-at price becomes the regular price and the Shopify price becomes the WooCommerce sale price.
-
Review what was imported
Once the import finishes, ShipPress displays a report summary: … products imported into WooCommerce (no reviews or orders). It also shows: … pictures, videos and fonts saved; … still load from the original. If some files still load from the original store, click Show to see their links, and replace those pictures (by chat, or in Dashboard → Media) while your Shopify store is still online.
Because platform architectures differ, some data cannot be copied across:
- Orders, customers, and customer reviews
- Coupons and exact stock quantities (products are marked only as in stock or out of stock)
- Shipping zones, tax settings, and payment gateways
- Subscription rules (subscription items are imported as standard products with options)
- Third-party app add-ons and custom Shopify product-page layouts
Your imported product pages use WooCommerce's standard layout nestled within your site's header and footer. To inspect your items, open the Dashboard tab and click Products. If anything looks wrong, you can always revert the import under History by returning to the restore point named Before importing (restore points guide).
-
Adjust currency and products by chat
Shopify's public product feed does not include a currency, so products arrive set to US dollars with their numbers unchanged. If you sell in another currency, ask the AI helper to change it. For example, tell the chat: "Switch the store currency to British Pounds" or "Change shop currency to euros". The prices will keep their existing numeric values in the new currency.
You can also use chat to edit descriptions, change prices, or put items on sale. For more examples, see our guide on managing a WooCommerce store and editing by chat. If you want a fresh look for your storefront, click Change this site's design… in the site menu to browse new designs. Your posts, photos and menus stay, and a restore point is saved first (finding a design).
-
Configure settings and go live on a WordPress host
Payment gateways, shipping methods, and taxes are not brought over during import. In WooCommerce, you can temporarily enable Cash on delivery to place a test purchase. For credit card payments, choose and configure a payment provider on your live site; see the guide on WooCommerce: Which payment option is right for me?. Configure your shipping zones and tax rates directly in WooCommerce settings.
When you are ready to publish, click Go live. When examining the publication options, the app displays this shop notice: "This site has a shop (WooCommerce). The cart, checkout and customer logins need WordPress running on a server, and a static copy is plain web files where none of that works, so ShipPress hosting and the static copy can't be used. Put it online with a WordPress host instead."
Click the WordPress host tab to deploy your site (go live guide and WordPress hosts guide). Point your custom domain to your new host by following your host's domain instructions. If your domain was bought through Shopify, its DNS settings are managed in Shopify. Cancel your Shopify plan only after you have placed a test order and checked your pictures and links on the live shop.
-
Selling on Etsy or other marketplaces?
If you sell on Etsy or another marketplace, note that ShipPress's product import reads a shop's own website: a Shopify store, a WooCommerce store, or product pages on your own site. A marketplace shop page is not your own website, so it is not something the import brings over. You can start from a shop design on the design wall instead.
Browse the design wall, select the E-commerce filter, and choose a shop layout. WooCommerce comes pre-installed. You can then add your products, descriptions, and pictures by chatting with the AI helper (WooCommerce guide and adding photos). You can keep selling on the marketplace while you build your store locally at your own pace.
Related guides: read about moving content in our Squarespace migration guide and learn how ShipPress runs real WordPress on your computer.