
Website redesign without starting over
Many site owners face an outdated website or a broken theme, but rebuilding every page from scratch takes time that small business owners rarely have. With ShipPress for Mac, Windows & Linux, you can complete a website redesign without starting over. You copy your existing pages onto your computer, apply a fresh design, adjust your content with the AI helper, and keep your old site online until the new look is verified.
-
Why a website redesign stalls and how to move forward
A website redesign often stalls when an outdated website needs a visual refresh or an older theme breaks after updates. If you run a small business or an online shop, hiring an outside agency may not fit your current budget. Rebuilding everything by retyping every page, blog post, and product description creates unnecessary work.
A practical alternative is to keep your existing content and update only the design layer. ShipPress is a free desktop app for Mac, Windows & Linux (see installation instructions) that builds a real WordPress website directly on your computer. Your live site remains online and untouched while you work locally. Nothing goes live until you decide to publish.
-
Before you start: review your pages and plan the transfer
Take a few minutes to prepare before moving your site into ShipPress:
- List the pages, articles, and product listings you want to keep.
- Note specific issues with your current look, such as cluttered navigation or hard-to-read typography.
- Choose how you will copy the site into the app.
You have two ways to bring your site onto your computer. If you have any public website, you can copy it by address. If your current site is already online as a WordPress site, open the From your host tab on Home to bring it onto this computer (download a site from your host). In both methods, your live website is never changed.
-
Copy your current site into ShipPress
Open ShipPress and go to Home. Select the tab Import from a website. The screen shows the heading Import a website from its address and the question Which website do you want to copy?. No credits are used for this step, and your original site stays untouched.
Enter the address of your website. You can choose This page only or click Next, give your site a name, and click Scan pages. The scanner respects robots.txt directives and reads your sitemap, or the front page links if no sitemap exists. On the screen Which pages to copy?, the option Front page (always copied) is selected by default. Use Pick all or Untick all to choose your content. If you are copying a WordPress site, ShipPress asks the site for its list of pages so other entries are categorized as posts. WooCommerce stores, Shopify stores, and product pages in a shop, store, or product(s) folder can become WooCommerce products.
Click Check it over and then Start import. The app opens each page in a real browser at desktop, tablet, and phone widths to build an editable WordPress block theme named “Imported site”. Media files are saved locally within standard limits, and forms transfer to the Imported Forms plugin. This import provides a starting copy that you should inspect page by page. If you need to undo the process, open History and choose the restore point Before importing. For detailed steps, see our guide on importing a website from its address. If you are moving from another platform, read our tutorials for Wix sites and Squarespace sites.
-
Open Change design and pick a ready-made design
Once your site is copied, click your site name at the top of the preview window to open the site menu. Click Change this site's design… or click the suggestion chip Try a different design. In the Tools tab, the current design is listed as “Imported site”.
The screen title shows Change design above the notice: Harbor Coffee uses “Imported site” now. Pick a new design; your pages, posts, photos and menus all stay. Below the heading Pick a new design for Harbor Coffee, you will find a design gallery with over 300 designs. You can browse using the search field or filter by Industry, Type, Colors, Style, and E-commerce. To learn how to test designs before choosing, see our guide on finding a design.
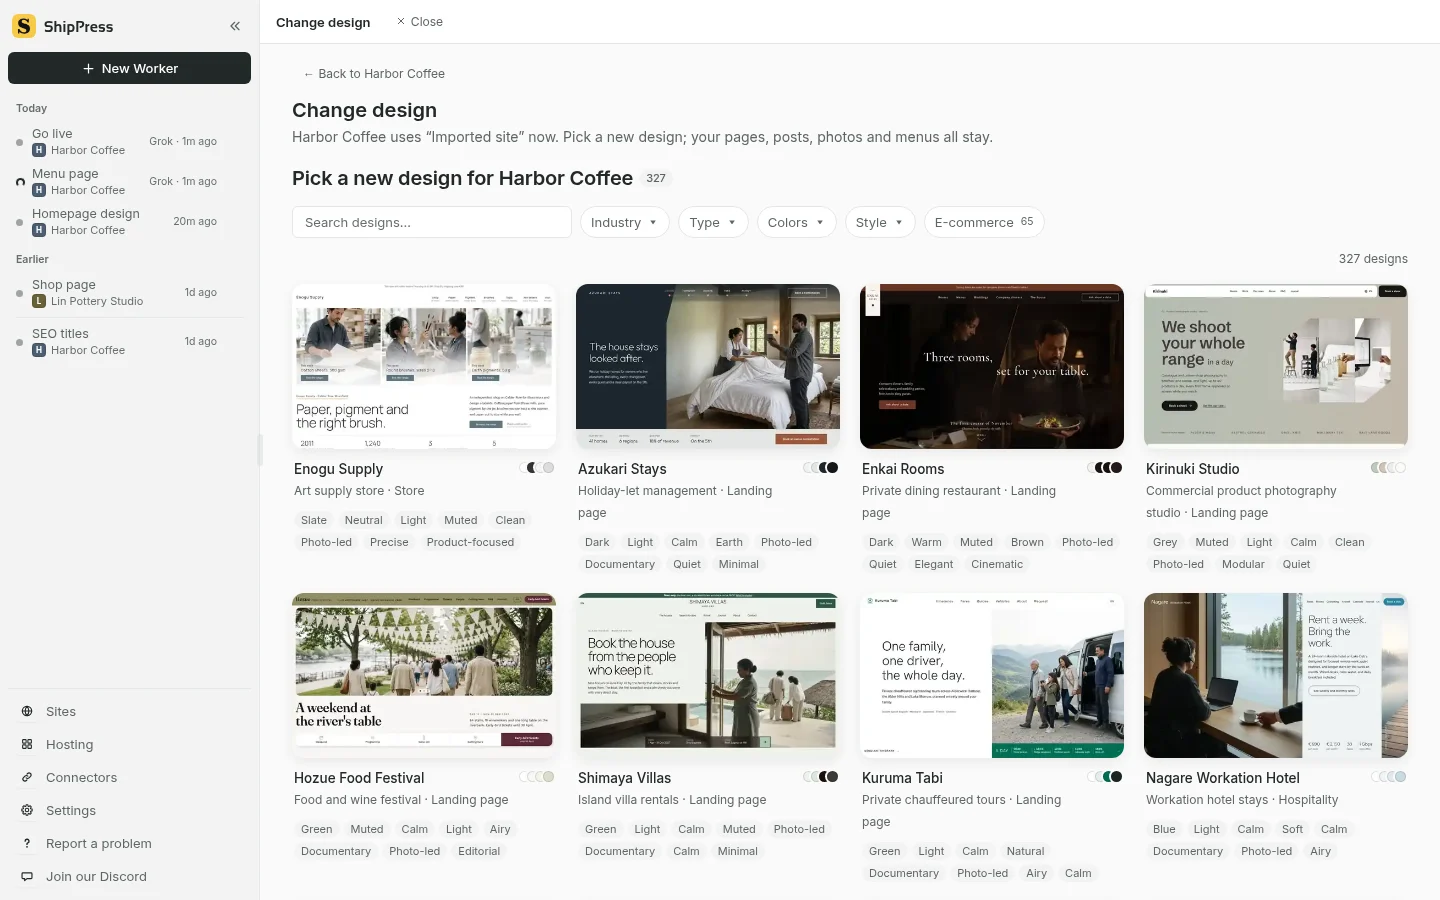
Browsing ready-made designs on the Change design screen in ShipPress (English UI). -
Confirm the switch and protect your content
Click a design card to open the confirmation dialog, such as Change Harbor Coffee to the Himuro Gelato design?. The dialog displays Now: Imported site (with the note: There's no preview picture of this design.) and New: Himuro Gelato side by side.
The dialog confirms two key points: Your posts, photos and menus all stay, and the words on your other pages aren't changed. and A restore point is saved first, so you can change back with one click. If you choose an online store layout, the store features powered by WooCommerce are enabled (setting up a WooCommerce store). Note the Home page behavior: if your Home page was built with the old design's layout (an imported Home page usually is), it is switched to the new design's look and sample content, and your own Home text is saved as the draft Home (previous design). If you previously customized headers, footers, or styles in the Site Editor, they will not appear in the new design, but they remain stored if you revert.
You will see a checkbox labeled Also add the new design's sample content. Leave this box unchecked if you already imported your pages; check it only when starting with an empty site. Click Use this design. ShipPress itself switches the design, without the AI helper. If the design needs to be downloaded for the first time, the download can take a minute or two.
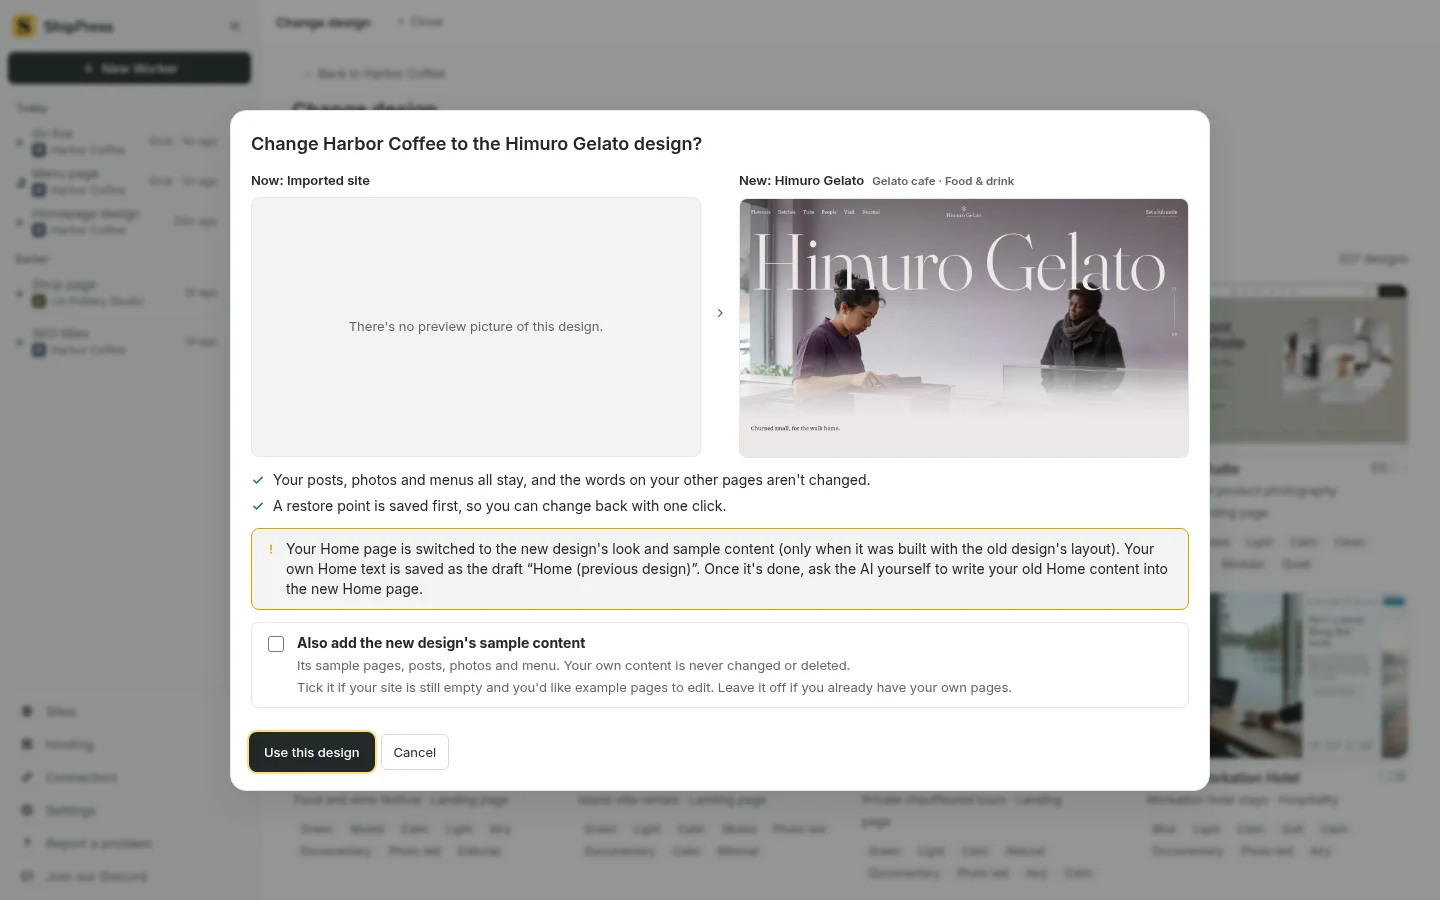
The design switch confirmation dialog shows your current design and new selection side by side (English UI). -
Restore your home page text and adjust details by chatting
After applying the new design, open the chat panel. You can ask the AI helper to restore your original front page copy by sending the app's suggested prompt: “Move the text from the draft ‘Home (previous design)’ into the current Home page.” The AI inserts your text into the new structure.
Next, refine the rest of your site through chat. You can replace remaining placeholder copy (fixing leftover sample text), upload your custom imagery and logo (adding photos and logos), and adjust global typography (site fonts) or color palettes (site colors). Learn more techniques in our guide to editing by chat. Switch the preview between Computer, Laptop, Tablet and Phone to review your layout (previewing screen sizes).
-
Change back or try another design if needed
When the design switch finishes, ShipPress displays a result card stating: Harbor Coffee now uses the Himuro Gelato design. Your pages, posts, photos and menus are all still there.
If the layout does not meet your expectations, you have options. Click See my site to inspect the pages, click Pick another design to browse alternatives, or click Change back to the previous design (Imported site). Changing back restores the restore point created right before the switch, which also reverts any edits made afterward. You can manage and review past states at any time in History (working with restore points).
-
Go live with your updated website
When you are satisfied with the new appearance on every screen size, click Go live in the top corner (going live guide). If your site was published from ShipPress previously, the live website keeps displaying your old design until you click Go live again.
You can publish to a free test address (publishing to a free address), which works for review purposes though search engines skip it and it cannot process WooCommerce checkouts or member logins. For a complete business website, choose a WordPress host (WordPress hosts guide and what Go live updates on your host) and connect your custom web address (connecting your own domain). Keep your old hosting plan and website active until you have verified all pages, links, and forms on the live address. Once confirmed, point your domain to the new host and close your old plan.
Related guides: Finding a design and Importing a website from its address.