
Make a free portfolio website from a ready-made design
As a photographer, illustrator, or designer, you need a portfolio website of your own to show clients your work. Social profiles are helpful, but a personal site gives you a space you control. With ShipPress on Mac, Windows & Linux, you can make a free portfolio website without building from scratch or writing code.
-
What a free portfolio website needs
A solid portfolio website does not need dozens of pages. It only needs three key elements:
- A selection of your best works.
- A brief introduction explaining who you are.
- A clear way for potential clients to reach you.
Starting from a blank page or generating a design from scratch with AI can lead to generic layouts. A ready-made portfolio design already includes standard pages such as Work, About us, and Contact. ShipPress is free to download for Mac, Windows & Linux, and hosting your site on a free address has no monthly fee.
-
Find a portfolio design on the design wall
Open ShipPress and go to Home → Start from a design to view the design wall. To narrow down the options, set Type to Portfolio, or choose Industry → Arts & media. You can also type terms like photographer or illustrator into Search designs…. Click Clear filters at any time to reset your search.
You will see designs tailored for different disciplines, such as Shashin Folio for a photography portfolio website, Hotaru Ehon for a picture-book illustrator portfolio, Koma Manga for manga artists, Yohaku Studio for a design studio, Utsushi Films for documentary film, Ugoki Animation for animation, and Kage Gallery for an art portfolio website. You can learn more about browsing in our guide to finding a design.
Please note: none of these portfolio designs include shop features. If you plan to sell prints or physical products, you will need WooCommerce and a WordPress host. See our guide on setting up a WooCommerce store.
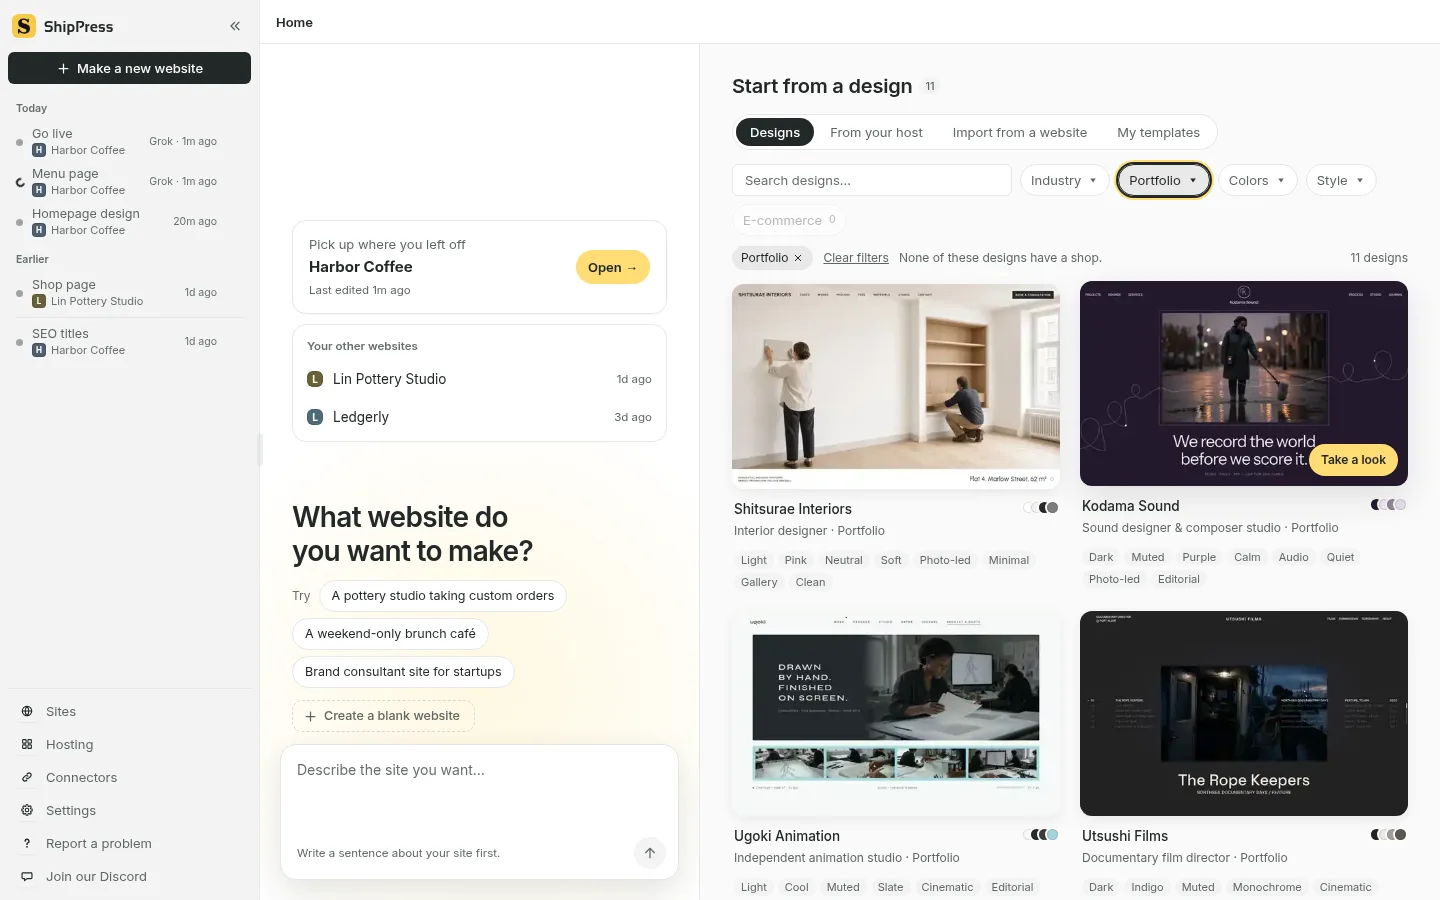
The design wall filtered to Portfolio designs (English UI). -
Preview pages and pick by structure
Hover over a card and click Take a look to inspect the design. Look across the page tabs at the top, such as Home, About us, Work, and Contact. Use the Computer and Phone switch to preview how the layout behaves on different screens.
Choose a design based on its page structure rather than its fonts or colors. The AI can adjust styling later, but having the right sections—like a Work page or Series pages—saves time. On the right, the What happens next? box explains three things:
- ShipPress creates a new website on your computer with this design and its sample pages.
- You tell the AI in the chat which words and photos to change.
- Nothing goes online until you click Go live.
Type your site title into What's your website called? and click Use this design. The first time you use a design, it downloads to your computer, which can take a minute. Once ready, your site opens on the right and your Worker appears on the left.
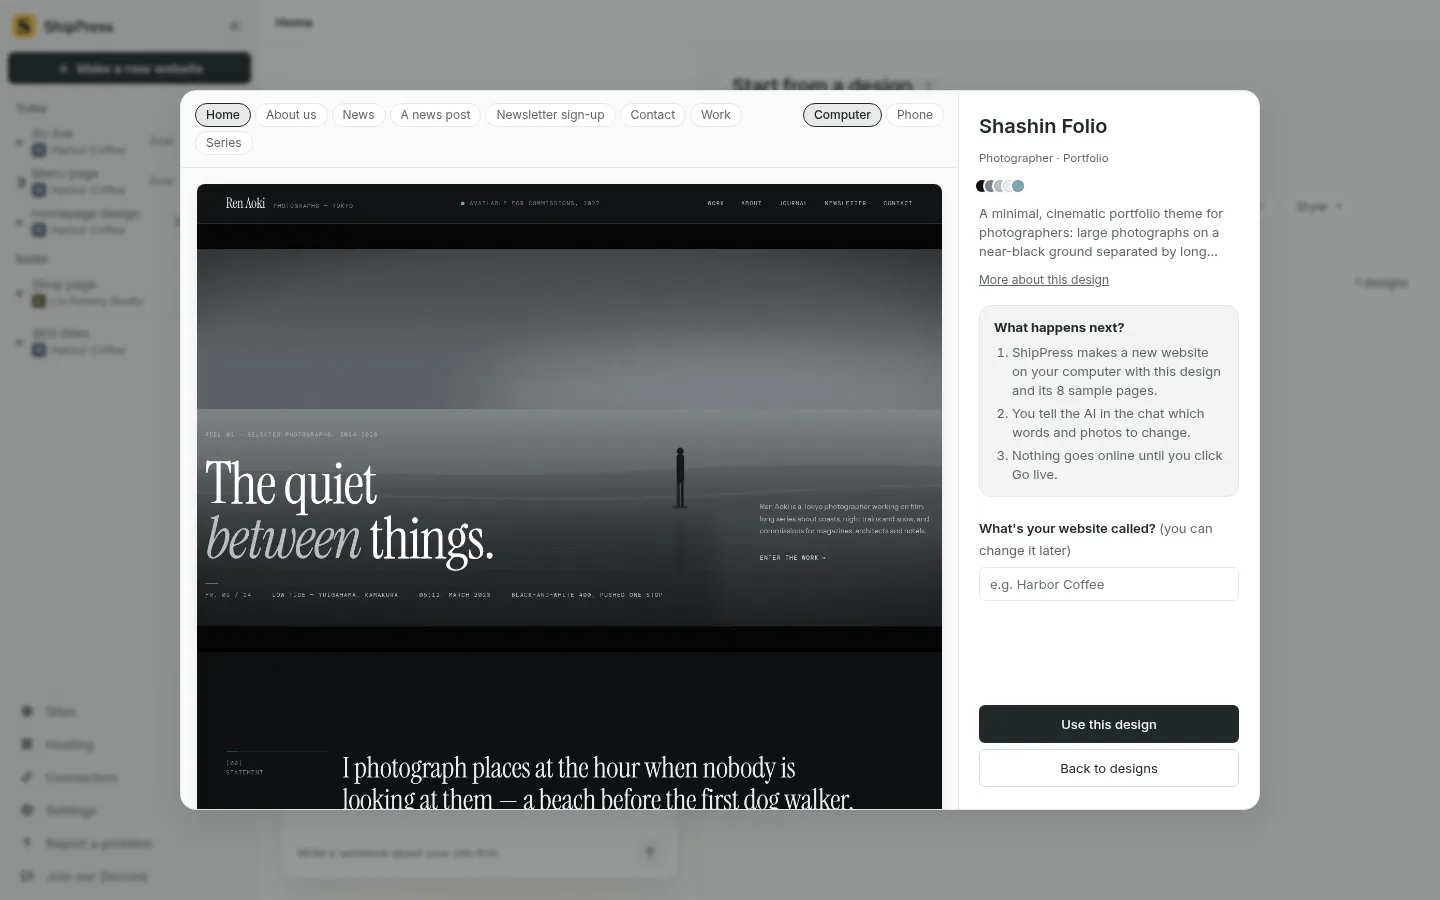
Previewing Shashin Folio before creating your site (English UI). -
Replace sample text by chatting
Your new site comes with placeholder text. You can replace it simply by telling the Worker what you want in plain words. Always specify the page name so the Worker knows where to work.
For example, you can write: On the About us page, update the bio. My name is Alex, I am an illustrator based in Chicago specializing in children's book illustrations. Here is my short background...
Press Enter to send your message. The Worker reads the page first, then updates the text step by step. You can keep typing additional messages while it works. Whenever a change needs your OK, an approval card appears; click Allow to proceed. For more details on editing, see our guides on editing by chat and how to fix leftover sample text.
-
Add your own work through chat
To showcase your illustrations or photography, add images directly through the chat. Click the paperclip icon below the message box, paste images with Ctrl+V (⌘V on Mac), or drag files into the chat window. ShipPress supports PNG, JPG, WebP, and GIF files up to 10 MB each (SVG and PDF are not supported). You can attach up to 6 pictures per message by holding Ctrl (⌘ on Mac) to select multiple files.
Give the Worker clear instructions along with your upload: Replace the photos on the Work page with these six images. Their titles are Project One, Project Two, Project Three, Project Four, Project Five, and Project Six.
The Worker inspects each image before placing it on the page. Before adding files to your WordPress Media Library (accessible under Dashboard → Media), an approval card will appear; click Allow. If you have more than 6 pieces to add, simply send them across several messages. Learn more in our guide to adding photos and logos.
-
Check every page and undo with restore points
After making changes, click Refresh above the preview window to see your updates. Use the page menu or All pages to navigate through every page. Switch the preview to Phone to verify that your images and galleries display cleanly on smaller screens.
Every finished modification automatically creates a restore point under History. If you do not like an edit or want to revert an image replacement, you can return to any earlier state. Read our guide to restore points to see how version history works.
-
Add a contact form for client inquiries
Clients need a simple way to get in touch for commissions or assignments. Ask your Worker to place a form on your Contact page: Add a contact form with name, e-mail and message to the Contact page.
The Worker may offer to install a form plugin such as Contact Form 7. An approval card will pop up; click Allow to let it install. On a free ShipPress address, messages are e-mailed to the e-mail address you signed in with for free hosting, with no mail server or SMTP setup. Each site can receive up to 100 messages a month. For full instructions, check our contact form guide.
-
Publish your free portfolio website and connect a domain
When you are ready to share your portfolio, click Go live in the top right. Select the Free address tab and choose ShipPress hosting. Enter your e-mail address, confirm it with the six-digit code, and click Put it on a free address.
Your site will be published at a free web address ending in .workers.dev, without requiring any hosting contract or monthly hosting fees. This free address includes a Trial badge, which indicates that search engines will skip indexing the site. When you make updates to your portfolio later, clicking Publish changes will upload only the modified files.
To establish your own branding and be discovered in search results, you can connect your own custom domain later. Go to Sites → Address and choose to connect an existing domain (connecting a domain you already own is free; simply add the provided DNS records at your registrar) or purchase a domain directly in the app, which is paid yearly. If you prefer traditional hosting, you can also connect a third-party WordPress host. Read our guides on publishing to a free address, connecting your own domain, and going live.