
Add a new page and put it in the menu by chatting
Sooner or later your site needs a page it didn't start with: events, catering, a price list, a FAQ. In WordPress that means creating the page, building its layout, then opening the menu settings to add a link. In ShipPress you say it once in the chat. In this tutorial I add a Private Events page to Pier 7 Coffee and put it in the top menu, then fix the one thing that didn't look right.
-
Look at your menu first
Open your site in ShipPress and look at the top menu in the preview. Pier 7 Coffee has Lots, Bar, Roastery, People, Journal and Visit. Decide what the new page is called, what the menu link should say, and where it should sit. A short menu label is easier to read than the full page title.

The top menu before: six links. -
Describe the page in one message
Click into the chat box at the bottom left and write what you want, the way you would explain it to a friend who builds websites. Put these in the same message:
- The page name, here “Private Events”.
- What it should say: who it is for, when, how many people.
- How it should look: “the same style as our other pages”, and which photo to use.
- How people get in touch. I wrote “ask us at the bar or call us (no form)”, so the AI doesn't add a contact form.
- The menu: the label and where it goes, here “Events”, between Roastery and People.
Press Enter to send.
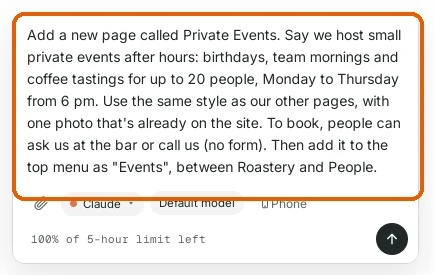
One message: the page, its content, its look, and its place in the menu. -
Let the AI build it
The AI says what it is about to do (here: build the page in the same layout as Cupping & Classes, with the bar photo, then add the menu link) and starts working. You can follow each step by opening the Worked · N steps rows. If you think of something else meanwhile, keep typing: your next message goes in as soon as this one is done.
For Pier 7 Coffee it took about a minute and a half. The new menu link showed up in the preview before the AI had even finished writing its reply.
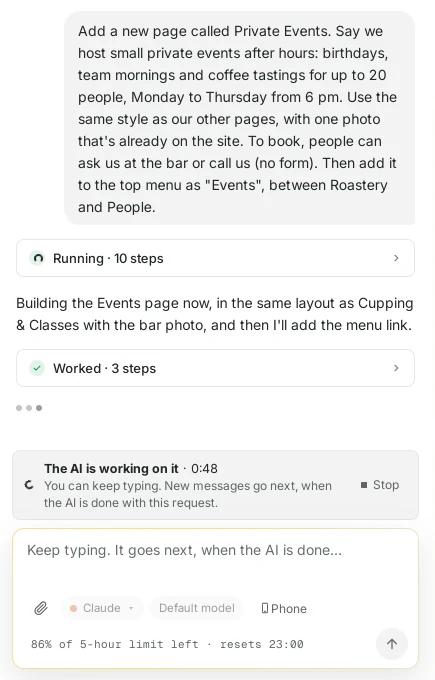
While it works you see each step, and you can keep typing. -
Read what it did
When it is done, the AI sums up the change: the page is live, “Events” sits in the top menu between Roastery and People, the page uses the bar photo, and the booking line uses the phone number from the Visit page. Below the summary are buttons with good next steps, such as See what changed or Mention events on the Visit page. Click one if it is what you want, or just type your own message.
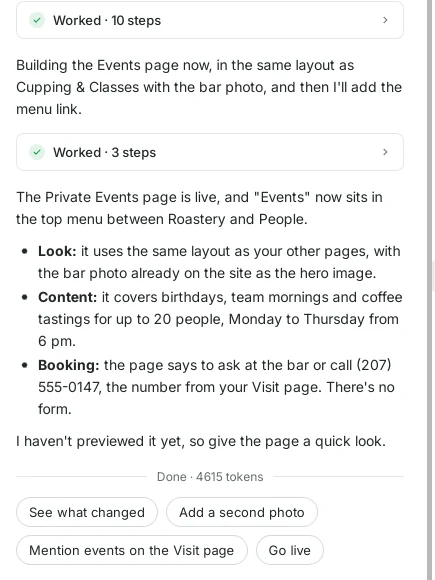
The summary tells you what changed, with suggested next steps below. -
Open the new page and look at it
Click Events in the preview's menu. It works like the real site: the new page opens. Read it as a visitor would. Is the text right? Does it look like the rest of the site?
Here the text was right, but the look wasn't quite: there was an extra “Private Events” title above the photo, and the photo and text sat in a narrow column, while the other pages start with a full-width photo.
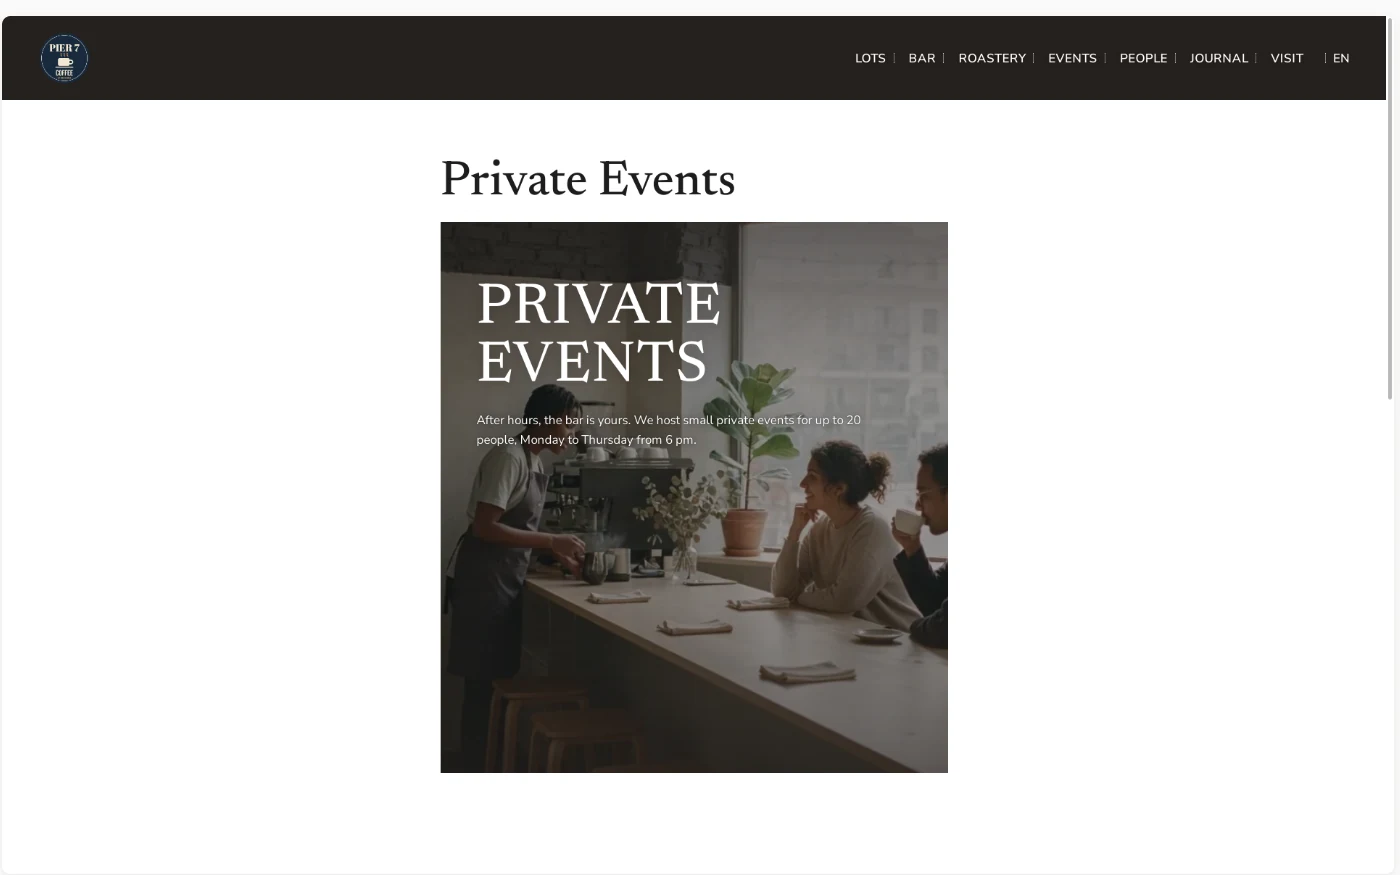
First version: right content, but an extra title and a narrow photo. -
Fix what doesn't match, in plain words
Say what you see and point to a page that already looks right. I wrote: “The Private Events page doesn't match the others yet: there's an extra title above the photo, and the photo and text sit in a narrow column. Make it look like the People page: no extra title, a full-width photo at the top, and the text below at the same width.”
Less than a minute later the page had the same full-width top as People, with the page name and intro line on the photo.
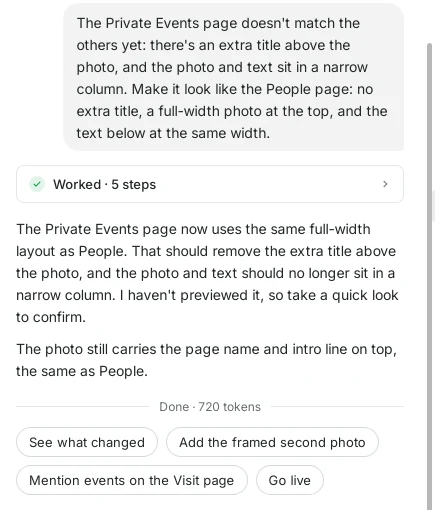
Naming a page that already looks right gives the AI a clear target. 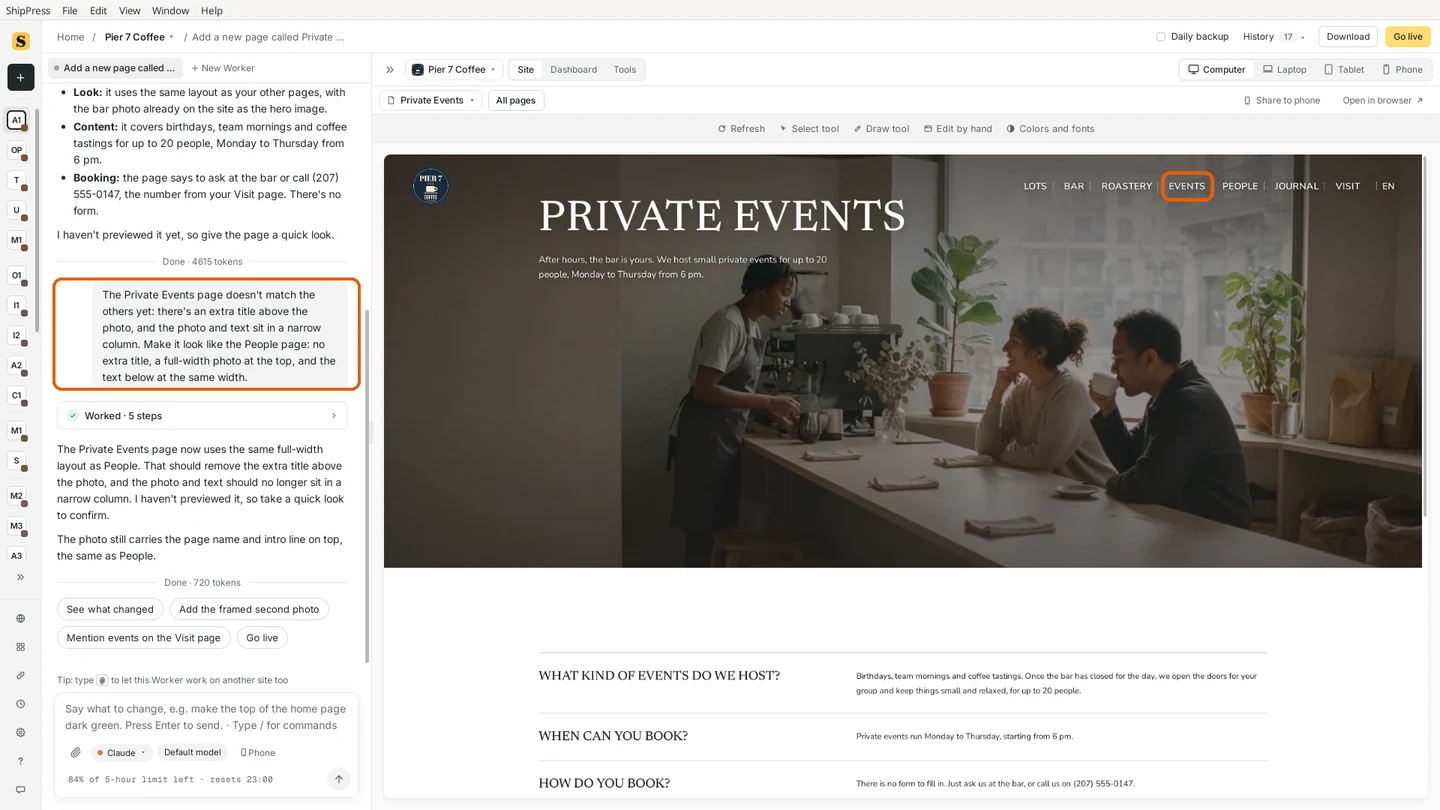
After the fix: full-width photo, no extra title. -
Check the whole page, and on Phone
Scroll down the page. Pier 7 Coffee's events page answers three questions (what kind of events, when you can book, how to book) and ends with the booking line and a link to plan a visit.
Then click Phone at the top right of the preview and open MENU. Events is there too, in the same place. Most visitors will see your new page on a phone, so this check is worth the ten seconds. (More in Check your site on Computer, Laptop, Tablet and Phone.)
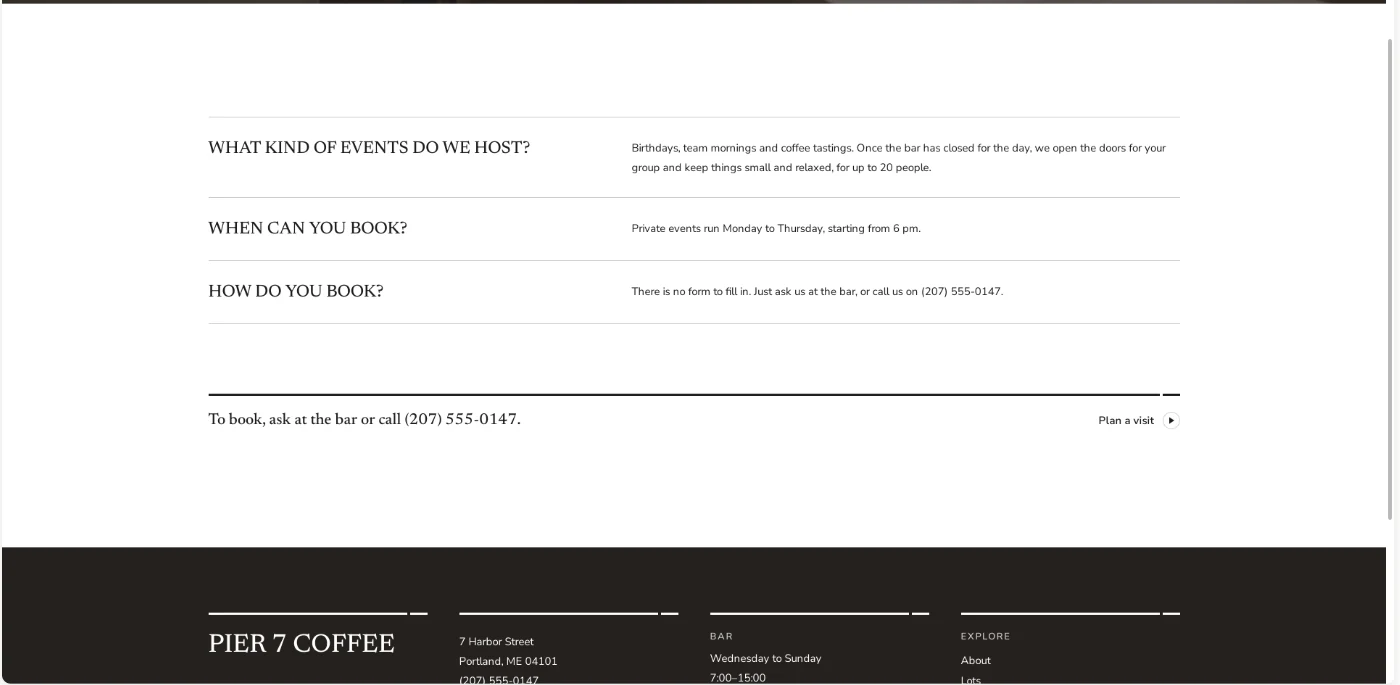
The rest of the page: three short answers and how to book. 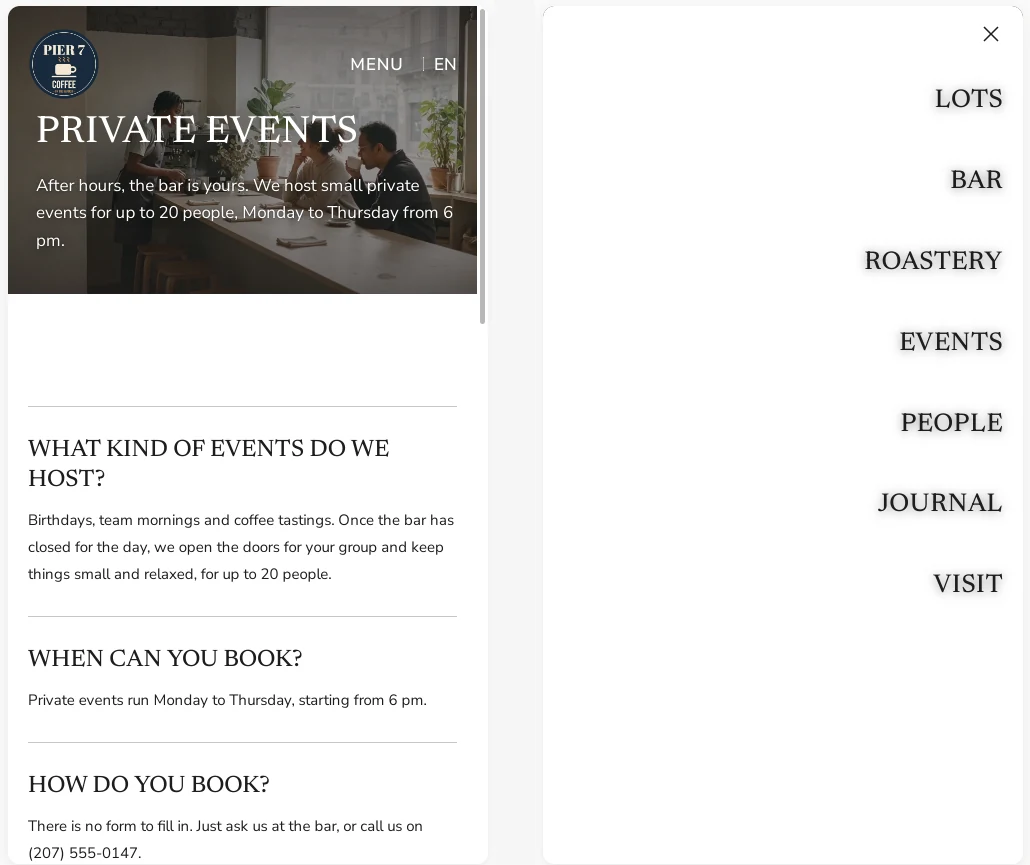
On Phone: the page, and Events in the menu. -
Find it later, or go back
The new page is a normal WordPress page. It is listed in the page menu at the top left of the preview, where you can jump to it any time, and in the dashboard under Pages.
Every AI change also saves a restore point. Click History in the top bar and you will see both steps: adding the page and the layout fix. If you don't like the result, click Restore next to the point before it.
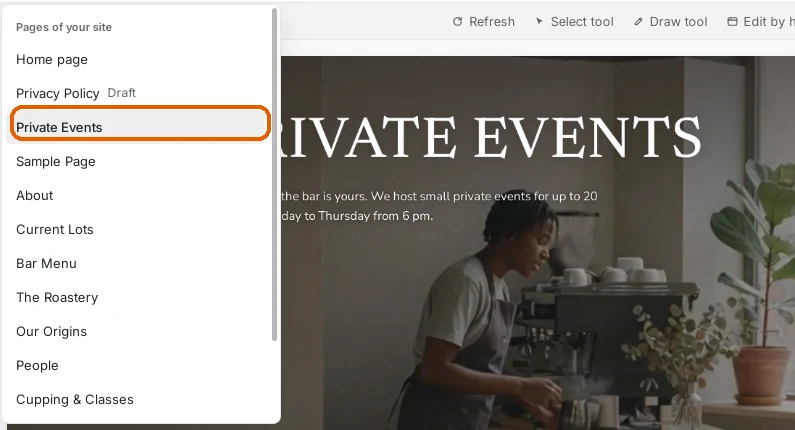
The new page is in your page list. 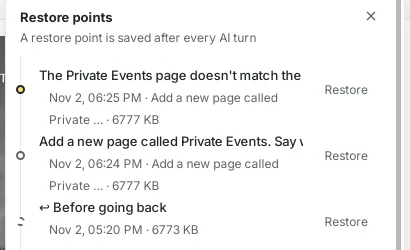
Each step is a restore point in History. -
Tips
- Say where the menu link goes (“between Roastery and People”, “at the end”). If you don't, the AI picks a spot.
- Keep menu labels short and the page title can be longer, like “Events” and “Private Events”.
- If you don't want a contact form, say so. If you do want one, say who should get the messages.
- When something looks off, name a page that looks right (“make it look like the People page”). That is clearer than describing the layout.
- For a page that should not be in the menu, such as a thank-you page, just say “don't add it to the menu”.
- More about editing by chat: Edit your site by chatting. To undo a change: Undo any AI change with restore points.